
In this article, I’m going to walk you through the foundational basics of SSMS. We’ll skip the fluff and focus on the core components you need to master to become a confident data professional.
SQL Server Management Studio Basics
What Exactly is SSMS?
Before we dive into the tutorial, let’s define our tool. SSMS is an Integrated Development Environment (IDE) used for managing any SQL infrastructure, from SQL Server on a local “pizza box” server in your office to highly scalable Azure SQL Databases in the cloud.
Crucially, SSMS is a client tool. It is not the database engine itself; rather, it is the interface you use to communicate with the engine. Think of it as the steering wheel and dashboard of a car, while the SQL Server Engine is the engine under the hood.
Why SSMS remains the Industry Standard
- Comprehensive Management: It handles everything from writing simple queries to complex performance tuning and security audits.
- Graphical Interface: It allows you to perform complex DBA tasks (like backups) through a GUI without memorizing every T-SQL command.
- Free to Use: While SQL Server licenses can be expensive, the management studio itself is a free download from Microsoft.
- Legacy and Reliability: It has been the go-to tool for American DBAs for two decades, meaning there is a massive community for support.
The SSMS Anatomy: Navigating the Interface
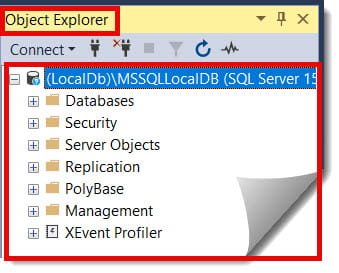
1. Object Explorer
Usually docked on the left, this is your primary navigation tree. It displays every server you are connected to and all the objects within them (Databases, Tables, Security, etc.). Check out the screenshot below for your reference.
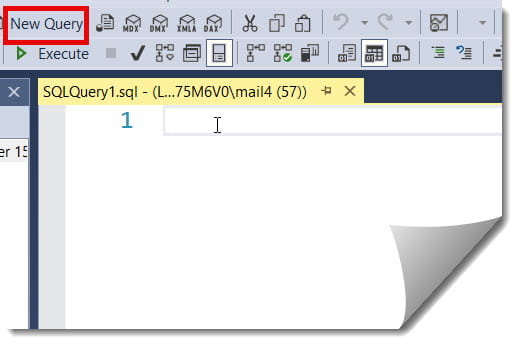
2. The Query Editor
This is the large central pane where the magic happens. This is your “blank canvas” for writing Transact-SQL (T-SQL) code. Check out the screenshot below for your reference.
3. The Results/Messages Pane
Located at the bottom, this appears after you run a query. The Results tab shows the data requested, while the Messages tab tells you if the query succeeded or if there was an error (and how many rows were affected).
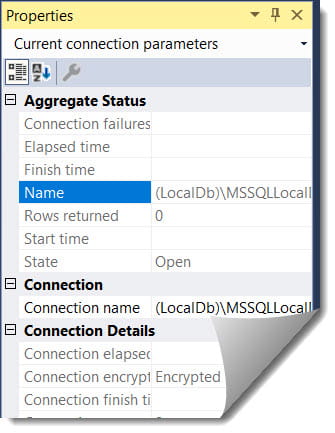
4. Properties Window
Often hidden on the right, this provides granular details about whatever object you have selected in the Object Explorer. Check out the screenshot below for your reference.
Tutorial Part 1: Connecting to a Server
Your journey begins with the Connect to Server dialog box. This is the first thing you see when you launch the application.
- Server Type: For most of your work, this will stay as “Database Engine.”
- Server Name: This is the “address” of the SQL Server. In a US corporate environment, this might be a name like
PROD-SQL-01or an IP address. If you’ve installed SQL Server locally, you can simply type.(a period) or(local). - Authentication: This is how you prove who you are.
- Windows Authentication: Uses your current Windows login. This is the gold standard for security in most US offices.
- SQL Server Authentication: Requires a specific username (like
sa) and password. - Azure Active Directory (Microsoft Entra): Increasingly common for cloud-based roles.
| Authentication Type | Best For | Security Level |
| Windows Auth | Internal Corporate Networks | High |
| SQL Auth | Legacy Apps / Cross-domain access | Medium |
| Entra ID (MFA) | Cloud / Remote Work / Azure | Highest |
Tutorial Part 2: Working with Databases and Tables
Once connected, you’ll see the “Databases” folder in the Object Explorer. This is where your data lives.
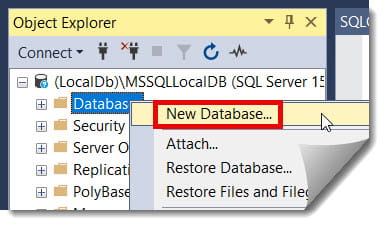
Creating a Database
While you can use code, beginners often prefer the GUI:
- Right-click the Databases folder.
- Select New Database….
- Enter a name (avoid spaces; use underscores like
Sales_Data_2026). - Click OK. Check out the screenshot below for your reference.
Navigating Tables
Expand your database, then expand the Tables folder.
- To see the data in a table: Right-click it and select Select Top 1000 Rows. SSMS will automatically write and execute the query for you.
- To see how a table is built: Right-click and select Design. This shows you the column names and “Data Types” (e.g.,
int,varchar,datetime).
Tutorial Part 3: Mastering the Query Editor
As you grow in your career—perhaps aiming for a Data Analyst role in Austin or a Developer role in New York—you will spend 90% of your time in the Query Editor.
Writing Your First Script
Click the New Query button in the toolbar (or press Ctrl + N).
Always start your script with the USE command to ensure you are pointing at the right database:
USE Sales_Data_2026;
GO
The “Execute” Flow
- Type your T-SQL code.
- Highlight only the portion of the code you want to run (this is a pro tip—if nothing is highlighted, SSMS runs the whole page).
- Click the green Execute button (or press
F5).
IntelliSense: Your Personal Assistant
SSMS includes IntelliSense, which suggests table and column names as you type. If it stops working (a common frustration), you can refresh it by pressing Ctrl + Shift + R.
Tutorial Part 4: Essential Shortcuts and Pro-Tips
Efficiency is what separates the experts from the amateurs. Here are the shortcuts I use every single day in my consulting work.
- Ctrl + E or F5: Execute the highlighted code.
- Ctrl + R: Show or hide the Results pane (great for maximizing screen space on laptops).
- Ctrl + K, Ctrl + C: Comment out the selected text (useful for testing different query versions).
- Ctrl + K, Ctrl + U: Uncomment the selected text.
- Alt + F1: Highlight a table name and press this to see its schema details instantly.
The “Templates Explorer”
Most beginners overlook this. Go to View > Template Explorer. This provides hundreds of pre-written scripts for common tasks like creating indexes, managing logins, or backing up databases. It’s essentially a built-in “cheat sheet.”
Tutorial Part 5: Understanding Database Security Basics
In a US-based enterprise, security is paramount (especially with regulations like CCPA and HIPAA). In SSMS, security is handled at two levels: Logins and Users.
- Logins: Found under the “Security” folder at the Server level. This allows a person to get into the building.
- Users: Found under the “Security” folder inside a Specific Database. This allows the person to enter a specific room in that building.
Assigning Permissions
You don’t need to be a security expert to start. You can right-click a User, go to Properties, and use the Membership page to assign roles.
- db_datareader: Can read all data.
- db_datawriter: Can add or change data.
- db_owner: Full control over that database.
Troubleshooting Common Beginner Hurdles
Even in a perfect setup, things go wrong. Here is how to handle the “Big Three” issues I see in entry-level support tickets.
1. “Login Failed for User.”
Usually, this means you are trying to use Windows Authentication while logged into a local computer account, or the SQL Server isn’t configured to allow SQL Authentication. Always double-check your credentials first.
2. The “Red Squiggly” Lines
IntelliSense often lags behind. If you just created a table and SSMS says it doesn’t exist (red underline), don’t panic. Refresh your local cache (Ctrl + Shift + R) and try again.
3. Connection Timeouts
If you are working remotely—perhaps for a firm in Boston while you are in Florida—your VPN might be slow. You can increase the “Connection Timeout” in the Options section of the connection dialog box.
SSMS vs. Azure Data Studio: Which should you use?
Microsoft now offers two main tools. As a beginner in 2026, it’s important to know the difference.
| Feature | SQL Server Management Studio (SSMS) | Azure Data Studio |
| Platform | Windows Only | Windows, macOS, Linux |
| Deep Administration | Yes (Backups, Security, Profiler) | Limited |
| Modern Coding | Traditional | Modern (Notebooks, Git integration) |
| Primary Use Case | DBAs and heavy Enterprise Admin | Developers and Data Scientists |
My Take: If you are on Windows and need to do “heavy lifting,” stick with SSMS. It is the full toolkit.
Expert Best Practices for New Users
To wrap up this tutorial, I want to leave you with three “Golden Rules” that will save your career more than once.
Rule 1: Always check the bottom right corner
SSMS displays the Server Name, Database Name, and User Name in the status bar at the bottom. Check this before you hit Execute. You don’t want to accidentally run a DELETE script on the Production server when you thought you were on Development.
Rule 2: Script everything
Instead of just clicking “OK” in a dialog box, look for the “Script” button at the top of the window. This generates the T-SQL code for the action you are about to take. Reading this code is the fastest way to learn how SQL Server actually works.
Rule 3: Use Dark Mode (Carefully)
In 2026, SSMS will finally have a stable dark mode. While it looks cool and saves your eyes during late-night shifts in the NYC financial district, make sure your “Grid Results” are still readable.
Video Tutorial
Conclusion:
Mastering SQL Server Management Studio basics is the first step in a long and rewarding career in data. Whether you want to be a Database Administrator, a Data Engineer, or a Business Intelligence Analyst, SSMS is the gateway through which all your work will flow.
Focus on the Object Explorer, get comfortable in the Query Editor, and always script your actions. Within a few weeks, it will feel like home.
Now, fire up SSMS, connect to your local instance, and start exploring. The data is waiting.
You may also like the following articles:
- SQL Server Roadmap
- SQL Server Agent in SSMS
- Debug Stored Procedure In SSMS
- Rename Database SSMS
- SQL Join Example With Where Clause
- SSMS Keyboard Shortcuts
After working for more than 15 years in the Software field, especially in Microsoft technologies, I have decided to share my expert knowledge of SQL Server. Check out all the SQL Server and related database tutorials I have shared here. Most of the readers are from countries like the United States of America, the United Kingdom, New Zealand, Australia, Canada, etc. I am also a Microsoft MVP. Check out more here.