
In this authoritative tutorial, I will walk you through everything you need to know to safely detach a database using SSMS. We will cover the core architectural mechanics, critical pre-requisites, step-by-step graphical instructions, and T-SQL alternatives, while establishing the ultimate safety guidelines to protect your data integrity.
How To Detach Database In SSMS
What Does It Mean to Detach a Database?
Before we open SSMS, we must understand exactly what happens under the hood when a database is detached.
When you create a database in SQL Server, the engine takes exclusive operating system locks on two primary physical files:
- The Primary Data File (
.mdf): This houses your tables, indexes, stored procedures, and system catalog data. - The Transaction Log File (
.ldf): This records all structural changes and data modifications, ensuring transactional atomicity and recovery.
When you detach a database, you instruct the SQL Server instance to gracefully stop all transactions, flush dirty data pages from RAM to the physical disk, close its internal references, and release the file locks on those .mdf and .ldf files.
The Crucial Distinction: Detach vs. Drop vs. Delete
A common point of confusion is mistaking a detach operation for a drop operation. Let us clarify the differences using this quick reference comparison:
| Operation Type | Removes from SSMS GUI? | Deletes Physical Files (.mdf / .ldf)? | Reversible? |
| Detach | Yes | No | Yes (By re-attaching the files) |
| Drop / Delete | Yes | Yes | No (Requires a backup restoration) |
Think of detaching like unplugging a USB flash drive from your laptop. The files remain intact on the storage medium; the operating system simply stops interacting with it. Dropping a database, however, is equivalent to throwing that flash drive into an industrial shredder.
Critical Prerequisites Before Detaching
You should never detach a database on a whim. In production enterprise environments, failing to run through a standardized pre-check checklist can result in broken application connections, orphaned user sessions, or corrupted system states.
Before proceeding, verify that your target environment satisfies these four mandatory rules:
1. Identify and Sever Active Connections
SQL Server will block any attempt to detach a database if an active user or application pool is connected to it. If an application in Chicago is trying to execute a background query while you attempt to detach the database from a console in New York, the operation will fail immediately. You must alter the database state to terminate existing connections.
2. Verify It is Not a System Database
You cannot detach system databases. SQL Server requires these core structural containers to remain online at all times to keep the instance operational.
mastermodelmsdbtempdb
3. Check for Active Database Replication
If your database is actively participating in transactional replication, acts as a primary database in an Always On Availability Group, or is configured for database mirroring, you cannot detach it. You must systematically remove it from these high-availability topologies before decoupling the physical files.
4. Ensure No Active Snapshots Exist
If you have created any read-only database snapshots against your target database for reporting purposes, those snapshots must be manually dropped before the primary base database can be successfully detached.
Method 1: Detaching a Database via the SSMS Graphical Interface
Let us walk through the standard graphical user interface (GUI) approach within SSMS. This method is ideal for administrators who prefer visual verification at every stage of the lifecycle.
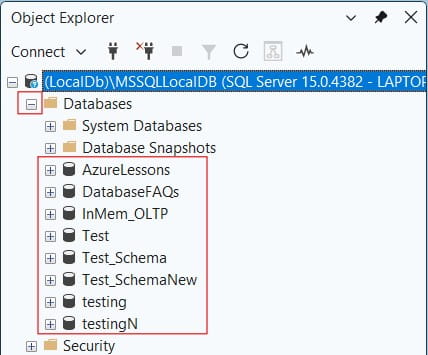
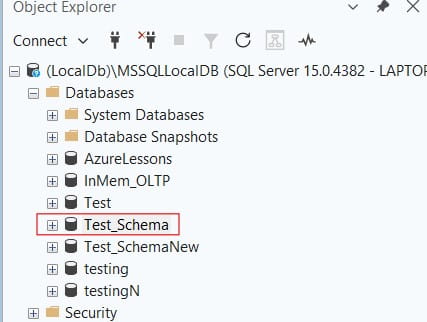
Step 1: Locate the Target Database
Open your SQL Server Management Studio and connect to the appropriate database engine instance using an account with sysadmin privileges.
In the Object Explorer panel on the left side of your screen, expand the server node, and then expand the Databases folder to reveal your list of online databases. Check out the screenshot below for your reference.
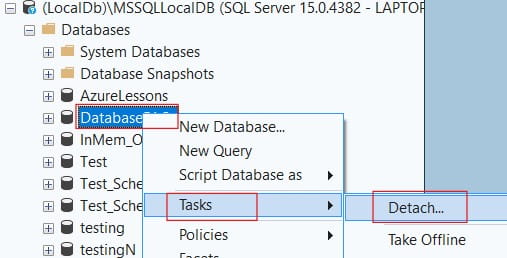
Step 2: Launch the Detach Database Dialog
Right-click the specific database you intend to decouple. From the context menu that appears, navigate to Tasks and select Detach….
This action launches the centralized Detach Database configuration window.
Check out the screenshot below for your reference.
Step 3: Configure the Detach Settings
Inside the Detach Database window, you will see a grid displaying the name of your target database along with several crucial checkboxes.
- Drop Connections: This is the most critical checkbox in the window. Checking this box instructs SQL Server to kill all active user connections and roll back any uncommitted transactions automatically. If you leave this unchecked and an active connection exists, the detach operation will throw an error and halt.
- Update Statistics: Checking this box tells the engine to update the database optimization statistics before detaching. This ensures that if you attach the database to a completely different server later, the query optimizer will immediately have accurate data distribution metrics.
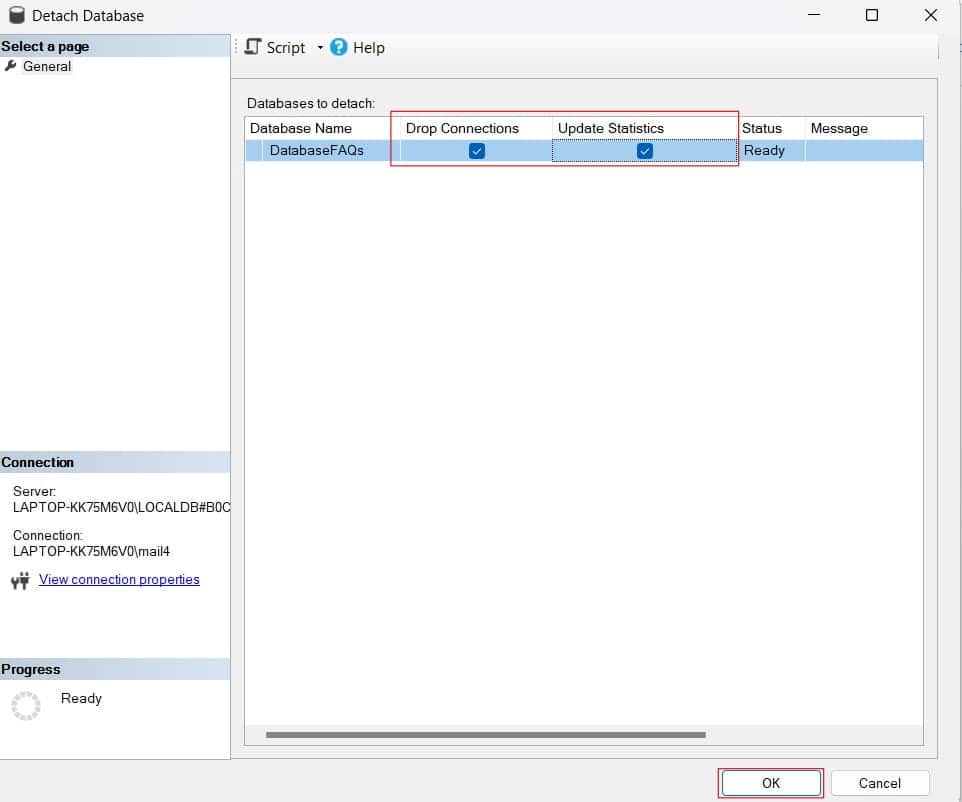
Step 4: Finalize the Operation
Review your selections in the grid. Once satisfied, click the OK button at the bottom of the window.
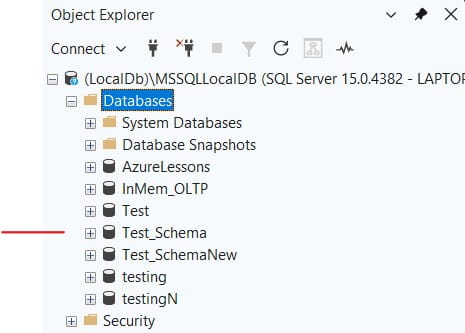
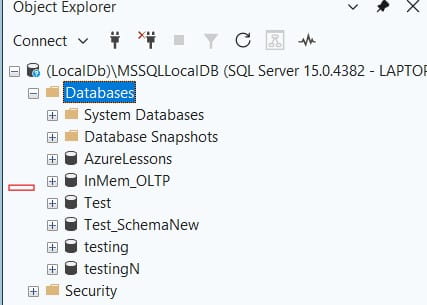
The dialog will close, the Object Explorer will refresh automatically, and your database will vanish from the local instance list. The physical .mdf and .ldf Files are now completely unlocked and ready for maintenance. Check out the screenshot below for your reference.
Method 2: The Authoritative T-SQL Approach
While the GUI is great for occasional tasks, professional database architects running automation configurations at scale prefer using scripted commands. Using T-SQL gives you exact programmatic control over the timing and mechanics of the operation.
We use the system stored procedure sp_detach_db to execute this task cleanly.
Step 1: Set the Database to Single-User Mode
To mimic the “Drop Connections” checkbox from the GUI, we must explicitly kick out any lingering application connections. We do this by altering the database state to SINGLE_USER with an immediate rollback mechanism.
SQL
-- Replace 'Test_Schema' with your actual database name
USE [master];
GO

ALTER DATABASE [Test_Schema]
SET SINGLE_USER
WITH ROLLBACK IMMEDIATE;
GO
The bove query executed successfully as shown in the screenshot below.
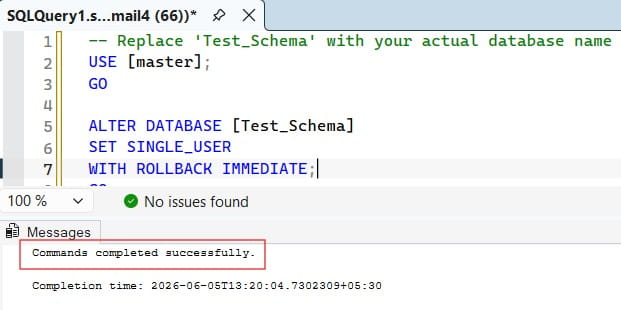
This script ensures that all active queries are cut off, outstanding transactions are rolled back safely, and your administrative session takes exclusive control of the asset.
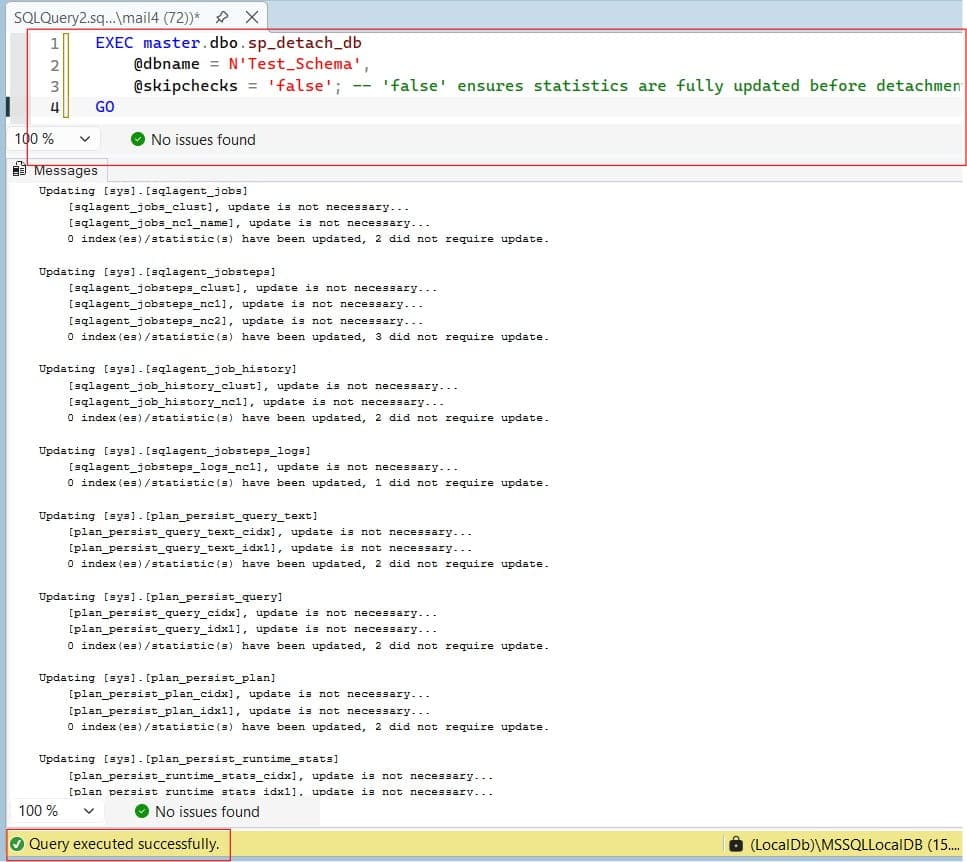
Step 2: Execute the Detach Stored Procedure
Now that the database is isolated, we call sp_detach_db. This procedure accepts the database name as its primary parameter, along with an optional boolean parameter to bypass or enforce statistics updates.
SQL
EXEC master.dbo.sp_detach_db
    @dbname = N'Test_Schema',
    @skipchecks = 'false'; -- 'false' ensures statistics are fully updated before detachment
GO
The T-SQL Parameter Breakdown
@dbname: The exact string name of the database you are detaching from the instance metadata.@skipchecks: Setting this to'false'ensures that statistics are fully updated, which is ideal when migrating production workloads. Setting it to'true'skips the check, speeding up the detach process for massive databases where data distribution properties aren’t a priority.
After executing the above script, I got the output as expected and the database has been dettached successfully as shown in the screenshots below.
Post-Detach File Operations and Best Practices
Once the database disappears from your SSMS Object Explorer tree, your work is only half done. As an authoritative data manager, you must handle the physical storage layer with extreme discipline.
Locating Your Orphaned Files
If you didn’t note down the exact directory paths before running the detach command, you can typically find your physical files residing within the default SQL Server installation data directory:
C:\Program Files\Microsoft SQL Server\MSSQL[Version].[InstanceName]\MSSQL\DATA\
Safely Moving or Copying the Files
Now that the operating system file locks are lifted, you can use standard Windows File Explorer cut, copy, and paste controls or enterprise command-line utilities like Robocopy.
Critical Safety Note: Never modify, rename, or delete the
.mdfor.ldffiles while a database is actively online or in a partially detached state. Always ensure the detach script completes with a “Command(s) completed successfully” message before touching the physical file system.
Troubleshooting Common Detach Errors
Even seasoned database professionals encounter snags when managing file access. Let us address the most common roadblocks you might face in a fast-paced corporate environment and how to overcome them.
Error: “Database is in use”
- The Cause: You attempted to detach the database without checking the “Drop Connections” box or running the
ALTER DATABASE... SET SINGLE_USERscript. An application or open query tab is holding the database context open. - The Fix: Rerun the T-SQL script using the
WITH ROLLBACK IMMEDIATEclause to forcibly clear the execution queue, then execute the detach command again.
Error: “Access Denied” or OS Error 5
- The Cause: When attempting to re-attach or move the files later, the Windows operating system throws a permissions error. This occurs because the account running the SQL Server service doesn’t have explicit Read/Write security permissions over the new folder destination.
- The Fix: Right-click the folder housing your physical
.mdfand.ldffiles, open the Security tab, and ensure that the specific service account running your SQL Server instance has full control permissions over that storage directory.
Conclusion
Mastering the detach process within SQL Server Management Studio is an essential milestone for any data professional looking to run an agile, high-performing environment. Whether you use the point-and-click ease of the SSMS task menus or write highly optimized T-SQL automation scripts.
You may also like the following articles:
After working for more than 15 years in the Software field, especially in Microsoft technologies, I have decided to share my expert knowledge of SQL Server. Check out all the SQL Server and related database tutorials I have shared here. Most of the readers are from countries like the United States of America, the United Kingdom, New Zealand, Australia, Canada, etc. I am also a Microsoft MVP. Check out more here.